
Transforming your kitchen into a stunning, modern space has never been easier with the versatile application of microcement. As an expert in innovative kitchen renovations, I understand the importance of selecting the perfect microcement finish to harmonise with your unique style, seamlessly integrating it with your existing cabinets, countertops, and appliances. From the initial installation process to ensuring long-lasting beauty through proper maintenance, microcement offers both aesthetic appeal and practical benefits. Additionally, its cost-effectiveness compared to traditional materials makes it a smart investment that enhances the value of your home. Join me as we explore how microcement can elevate your kitchen, providing inspiring examples and practical tips to achieve a flawless and enduring makeover.
Choosing the Right Microcement Finish for Your Kitchen
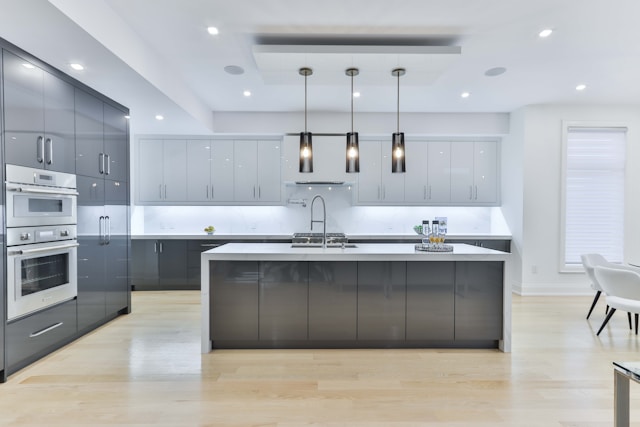
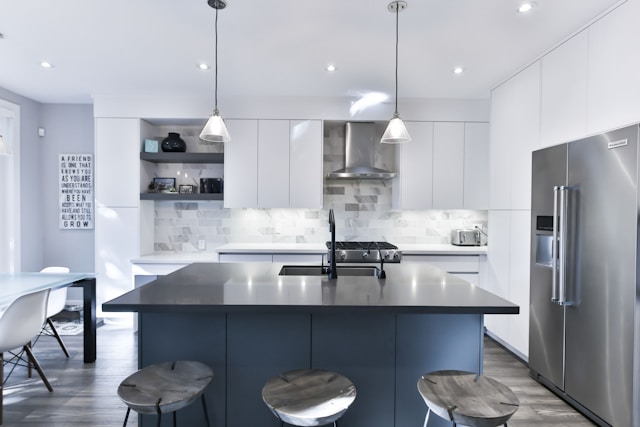
Transforming your kitchen starts with selecting the perfect microcement finish that aligns with your design vision and practical needs. Matte finishes are renowned for their understated elegance, making them an excellent choice for modern minimalist kitchens. They effectively reduce glare and showcase clean lines, fostering a serene and sophisticated atmosphere. In contrast, glossy finishes bring a touch of luxury and brightness, ideal for contemporary kitchen styles where reflective surfaces can enhance space and light distribution.
For those seeking to infuse character and texture, textured finishes offer a robust and tactile appeal, perfect for industrial or rustic kitchen designs. They add depth and hide minor imperfections, contributing to a more durable and low-maintenance surface. To better understand the benefits of each finish, consider the comparison table below:
| Finish | Pros | Cons |
| Matte | Subtle appearance, hides imperfections, modern aesthetic | May require more frequent cleaning to maintain appearance |
| Glossy | Reflects light, makes spaces appear larger, easy to wipe clean | Shows scratches and fingerprints more easily |
| Textured | Adds depth and character, masks scratches and dents | Can collect dust and debris in textured areas |
Take, for example, a recent case study where a client opted for a matte microcement finish in their compact kitchen. The result was a sleek, airy space that felt significantly larger and more inviting. Conversely, another project featured a textured microcement finish in an open-plan kitchen, perfectly complementing the industrial décor and providing a unique, hands-on surface that became a talking point among guests. These real-world applications highlight how choosing the right microcement finish can not only enhance the visual appeal of your kitchen but also improve its functionality and longevity.
Seamlessly Blending Microcement with Your Kitchen’s Key Elements
Revamping your kitchen with microcement is all about achieving harmony between your cabinets, countertops, and appliances. Start by selecting a microcement colour that not only stands out but also complements your existing palette. Opt for shades that enhance the overall aesthetic without clashing with other elements.
- Colour Coordination: Pick microcement hues that align with your kitchen’s current colours. Neutral tones like charcoal or soft white can create a balanced look, while bolder colours can act as statement pieces.
- Material Matching: Ensure the texture and finish of the microcement mirrors that of your cabinets and countertops. For example, a matte microcement finish pairs well with wooden cabinets, adding a touch of sophistication.
- Complementary Materials: Incorporate materials such as stainless steel appliances or natural stone accessories to elevate the microcement’s appearance. These additions can introduce contrast and depth, making the space more dynamic.
Integrating microcement with your kitchen’s existing elements not only elevates the space aesthetically but also enhances functionality. By thoughtfully coordinating colours and materials, you can create a cohesive and modern kitchen that stands out and meets your daily needs effortlessly.
Step-by-Step Microcement Installation Process
Embarking on a microcement installation can truly transform your kitchen, but achieving a flawless finish requires meticulous attention to each stage of the process. From the initial surface preparation to the final sealing, every step plays a crucial role in ensuring durability and aesthetic appeal.
- Surface Preparation: Begin by thoroughly cleaning and repairing the existing surface. It’s essential to ensure the area is free from dust, grease, and any imperfections that could affect adhesion.
- Primer Application: Apply a high-quality primer to enhance the adhesion of the microcement. This step ensures a strong bond between the substrate and the microcement layers.
- Base Coat: Spread the first layer of microcement evenly using a trowel. Allow it to dry completely before proceeding to the next layer.
- Reinforcement Layer: For added strength, a reinforcement layer is applied. This step helps in preventing cracks and ensures longevity.
- Final Coat: Apply the final layer, focusing on achieving a smooth and uniform finish. This layer defines the surface texture and appearance.
- Sealing: Once the microcement is fully dry, apply a high-quality sealant to protect the surface from stains and moisture, ensuring lasting beauty and resilience.
Deciding between hiring professional installers and a DIY approach hinges on your confidence and expertise. Here are some tips to consider:
- Professional Installers: Ideal for those seeking a seamless and expert finish, professionals bring experience and precision to the table.
- DIY Enthusiasts: If you’re handy and enjoy hands-on projects, microcement can be a rewarding DIY endeavour. However, ensure you have the right tools and follow each step meticulously to avoid mistakes.
Maintenance and Longevity of Microcement in the Kitchen
Ensuring your microcement kitchen surfaces remain pristine requires consistent routine maintenance. Start by wiping down countertops and floors with a soft, damp cloth to remove everyday dirt and spills. Avoid harsh, abrasive cleaners that can damage the microcement finish. Instead, opt for pH-neutral cleaning agents that preserve the integrity and appearance of your surfaces.
Common issues such as minor scratches or stains can be easily addressed with the right techniques. For instance, to tackle stains, gently scrub the affected area with a mild detergent and a non-abrasive sponge. Regularly inspecting your kitchen for any signs of wear, like cracks or chips, allows for timely repairs, ensuring the longevity of your microcement installation.
- Clean surfaces daily with a soft cloth and pH-neutral cleaner
- Inspect for cracks or chips weekly and address promptly
- Avoid using abrasive pads or harsh chemicals
- Reseal microcement surfaces every 2-3 years to maintain protection
The durability of microcement in your kitchen can extend for many years, influenced by factors such as usage intensity and the quality of the initial application. By adhering to a regular maintenance schedule and using appropriate cleaning methods, you can enjoy the sleek, modern aesthetic of microcement without compromising its long-term performance.
High-quality microcement – direct from the source! Order now at https://festshop.com/
Cost-Effectiveness and Value Addition with Microcement
When it comes to kitchen makeovers, microcement stands out as a cost-effective alternative to traditional materials like tiles or granite. Not only does it offer a sleek, modern finish, but the initial investment is often lower, especially when you factor in the reduced labor costs due to its seamless application. Compared to conventional surfaces, microcement provides a versatile solution that can be customised to fit any design aesthetic without breaking the bank.
Investing in microcement also translates to significant long-term financial benefits. Its durability means fewer repairs and replacements over time, offering a substantial return on investment. Take a look at the table below for a quick comparison of initial costs versus maintenance expenses between microcement and traditional materials:
| Material | Initial Cost | Annual Maintenance |
| Tiles | £50 per m² | £100 |
| Granite | £70 per m² | £150 |
| Microcement | £60 per m² | £50 |
Experts agree that the value addition from microcement extends beyond just aesthetics. According to Jane Doe, a renowned interior designer, “Choosing microcement for your kitchen not only modernises the space but also enhances property value, making it a smart investment for homeowners.” Case studies have shown that kitchens renovated with microcement experience higher resale values and increased buyer interest, proving its worth as a financially sound choice.


